^ Back to Home Page ^
o
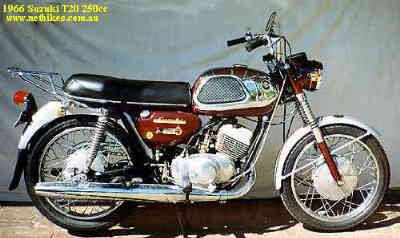
| Although the bike pictured above is not the subject of this workshop article it does have a connection to it. Were it not for this bike I probably would not have the ex racer T20. I purchased the above X6 from a local dealership in 1995, the motor was pulled for repair and the repair cost was too much for the owner so it was left unfinished and unpaid for. I purchased it for cost of "work to date". It was missing only the main stand and it was the search for this piece that I found the ex racer T20 along with 30 more T20, T200, T250 T10 and a few K10-15. The purchase of that lot is another story left untold here. |
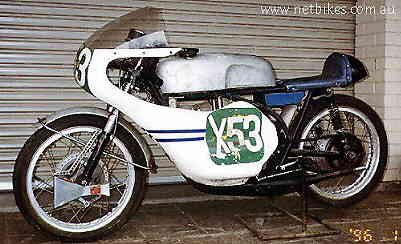
| Above pic of how I first recieved the bike. It had a holed piston and the story is that is was purchased new by a NQ dealership, immediately converted to a race bike, raced one season and not ridden since 1967 or thereabouts. I don't know how right that is.
The frame is modified with extra bracing as well as a seat support at the back of the frame. The front brake is what is called a Ventura system. The air is sucked in one side and blows out the other. It works very well. The rear brake plate also has cooling scoops. The tank is alloy and I presume hand made with workmanship top class, it is the nicest shape i have seen on any T20 T250 race bike, whoever did it get 10 out of 10 from me. The oil pump was not utilised for racing. |
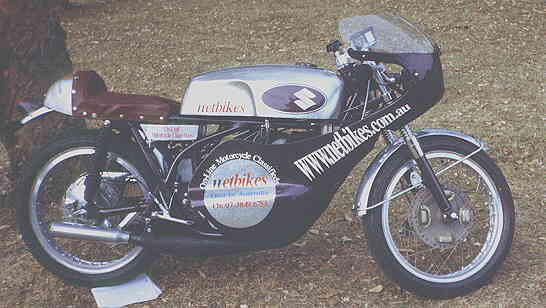
| was completed about 1997, lighting was added for road use, as the race barrels were scored from the holed piston and already at 1mm over I used another set of T20 stock barrels and pistons that were still on std bore, the oil pump was reactivated and the racing carbs were replaced with those from a GT250. I had to modify the GT carb mount holes to fit the T20 barrel, I also honed the barrel inlet ports to match the larger GT carb size. The chamber stingers were cut off and small "road legal" cans fitted. I am sure there is no difference in the noise factor:-)
The paint work was done by Chris Nessel painting, no longer in business.
|
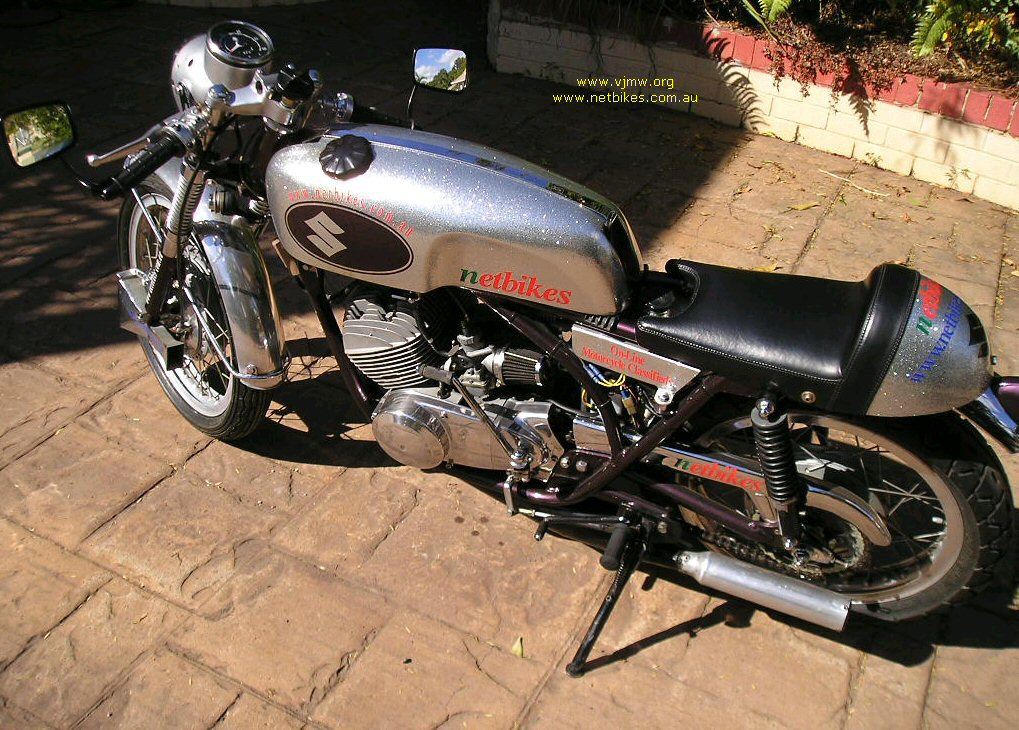
| Above picture, Not quite sure when this happened, just somewhere 2000+
I slid the bike down the road at some stage and although the fairing was not two badly damaged I just decided to leave it off. I fitted a stock T20 headlight, barend mirrors and had the seat redone, looks heaps better than the first recover. Apart from that, nothing else. I had also ran the bike out of two stroke oil at some time but being a man of experience:-) I read the signs and stopped immediately. I simply hand sanded the bore and refitted same pistons and rings, it has not given any more trouble but a couple of years down the track and I can notice a loss of top end compression and a couple of oil leaks that need looking after. This is the reason for morph three. |
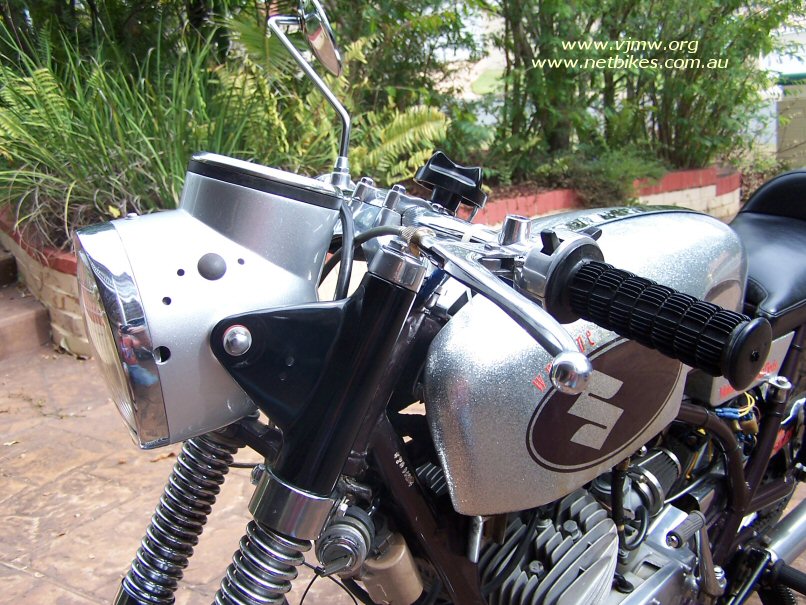
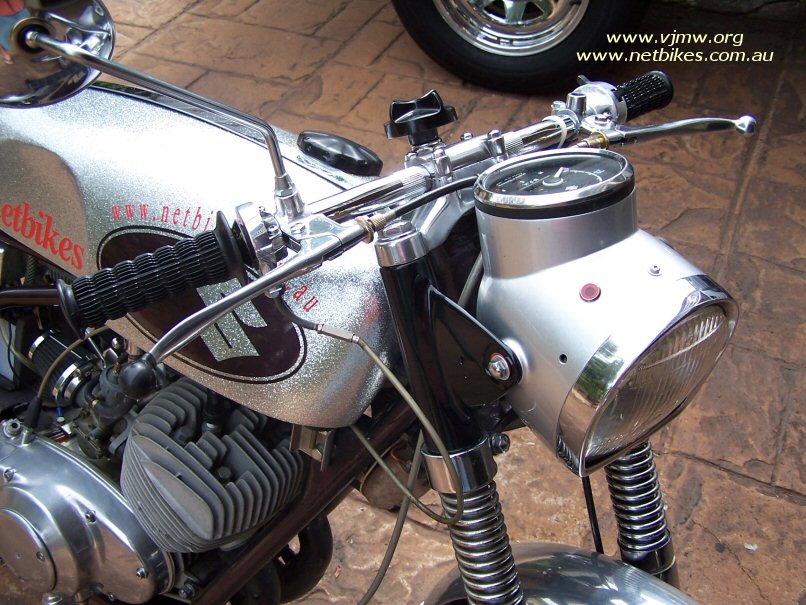

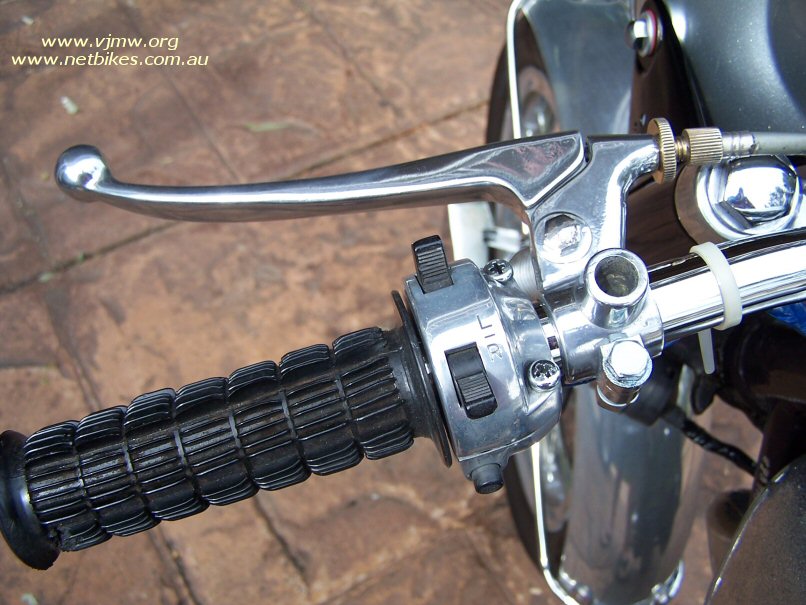
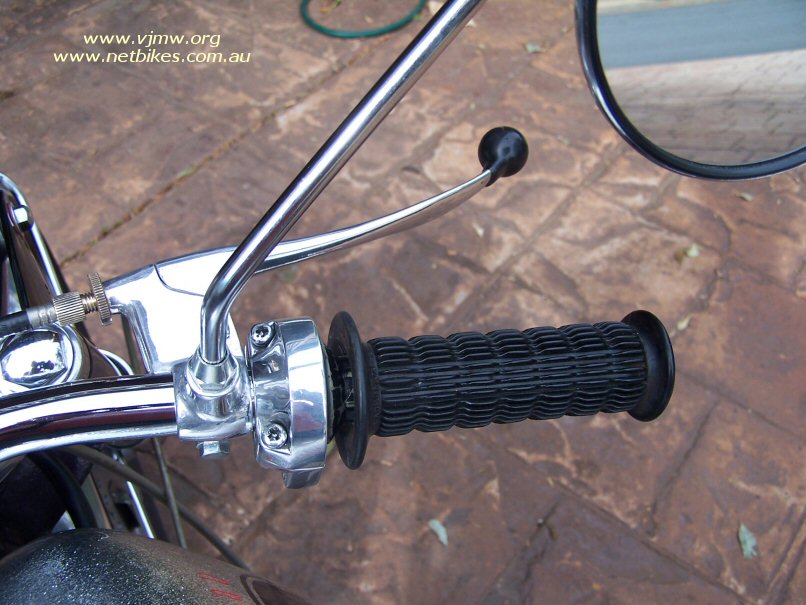

| Well I must be getting old, I have decided to lift the bars up a couple of inches.
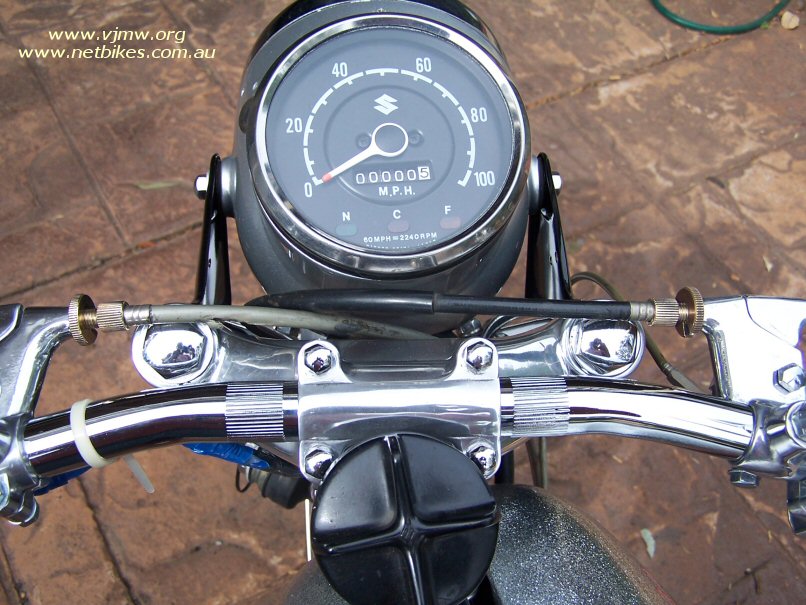
Actually not, I may ride this bike to the next vjmc rally in March 06. The rally will be at Newcastle which is about 8 hours from me so the drag bars should make the distance a little eaiser while still keeping the race look. I spent most of yesterday doing this and now that it is done I really like the look and feel. I replaced the A/M headlight stays with nos originals that I have had for a couple of years. The clutch lever is what Suzuki now supplies as right for T250 etc, you can see it has a slightly wrong fit and look if you comapare it to the brake lever which is genuine old stock. I'll hunt for an old stock lever. I also need another clutch lever perch, the mirror mount has been made unusable. And while on mirrors, these are not genuine but have the same look but no S on the back. I have a few sets of these if any one needs them. $40.00 a pair. Note the throttle grip is not fitted fully, its just that the grips are old and hard, I'll get nos soon and fit them fully. The drag bars are new A/M and were too long so I cut 50mm of each end, also note the grip nerling does not line up with the T20 bar mount but it looks ok to me anyway. The speedo is nos S32 and I believe it fits at least one model T200. Because of how the front brake Ventura cooling system is set up it makes the speedo drive unusable so thats why the speedo still shows 0 miles on it even though I have had it fitted for a while now. I did buy T20 speedo/combo about a year ago from Europe and it even KPH, perfect for here but unfotrunately it was lost in the mail. I have thought about connecting the tacho cable to the S32 speedo, wonder how that would work?? What I would really like to get is a T20 ignition switch, Paul miller has them but for some reason he just doesn't send one. A good used one would be fine. Ok I don't plan to do any more work on this one till I have finished the 69 T250 and the 67 CD175, (see other projects) likely around december. The motor will be removed, new outer seals to crank, gear cluster and the kick and gear lever seals replaced, hopefully this will elimate the oil leaks.The top end will be refreshed with 0.50 piston kit and barrels/heads re beadblasted. Some re rechroming done, a new set of rear-sets, something from a GSXR or similar and I may fit indicators. I'll also look at welding new steel mufflers to the chambers. This will elimate an annoying oil spill between the chamber and present cans although I guess that does help prevent oil build up inside, but with welded ends I can chrome the chambers if I want. Thats all for now.
|

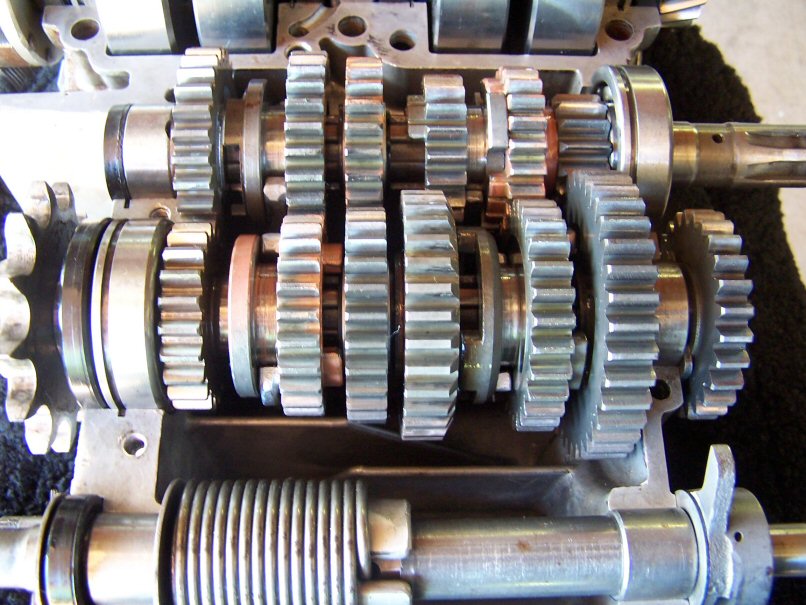

| Just a few pics above of the crank case internals. I have replaced all the outer seals, I did not split the crank to do the middles. Actually none of the seals needed replacing but while I had the cases apart to helicoil the oil drain plug I thought I may as well. The helicoil job cost a mere 20 bucks. The cases are now back together and mounted in the frame. The job from here is to reassemble everything and road test. Once I am happy with that I will start on the upgrades mentioned above. |
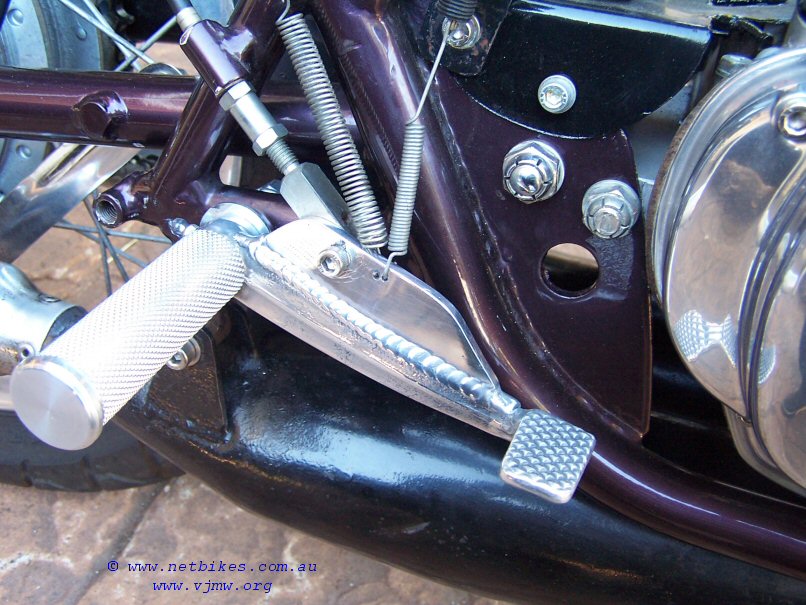

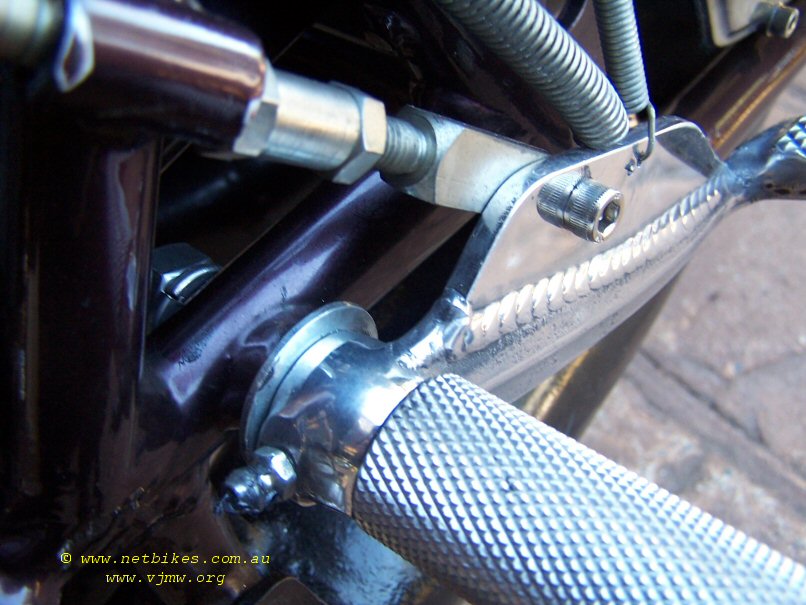
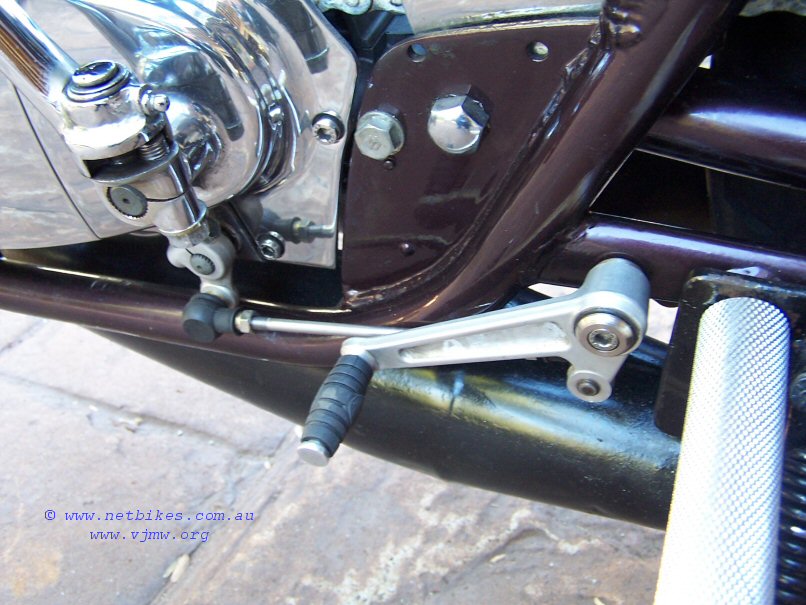
| Top row (brake) 1 2 3 .
1 The lever is from a FZR yamaha, a nice piece of allow shaped and welded on to house the spring and cable mountings. 2 I bought a piece of alloy to make the footrests, I can't remmeber the grade just now but will find out. It only cost 10 bucks, that much I remember. I got the local cycle machinist to run them up according to the specs I supplied, nicely knewled with clearence inside the brake lever just a tad above 0. It is mounted via 12 x 1.25 bolt threaded deep inside the foot peg and thru the frame, a nut on the other side of the frame secures it. The foot rest stepdown thru the brake lever is "just" longer than the width of the lever to allow it to free move. 3 A grease nipple was added, Yamaha apparantly presume their riders don't maintain their bikes.
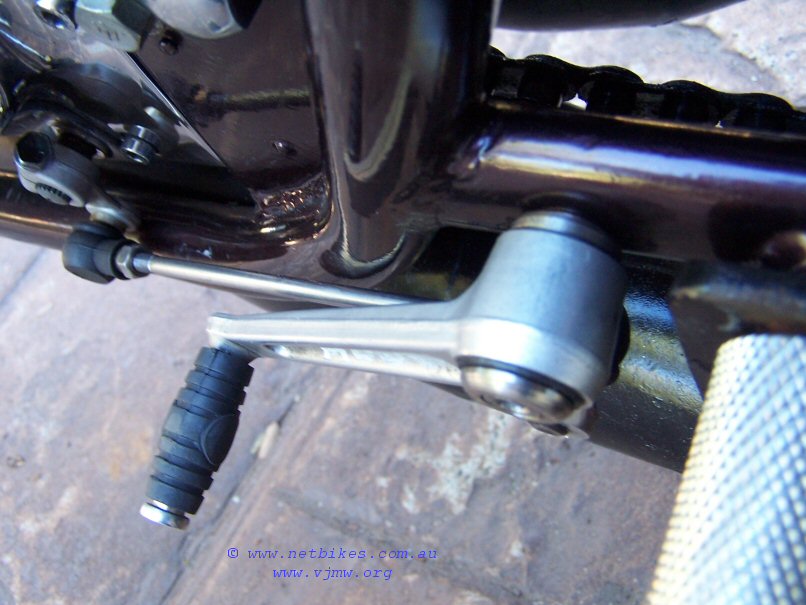
Bottom row (gear) 1 2.
2 Note the position of the nut that secures the gear lever assy spline to the gear shaft spline. Currently I need to remove the sprocket cover to retract the bolt fully, not a real bother but in the future I may may up a longer rod so I can move it forward. |